General Information
Find immediately below expanded information on how to download GLARS products which are not DSMs. Following this section, there is information for downloading DSM products because there are some minor differences in those views and download procedures.
IMPORTANT: If you have not done so already, please fill out the data access request form which the GLARS team is using to track interest in data by type and region. You can find the form at this link.
File Download Instructions
Download a Single File
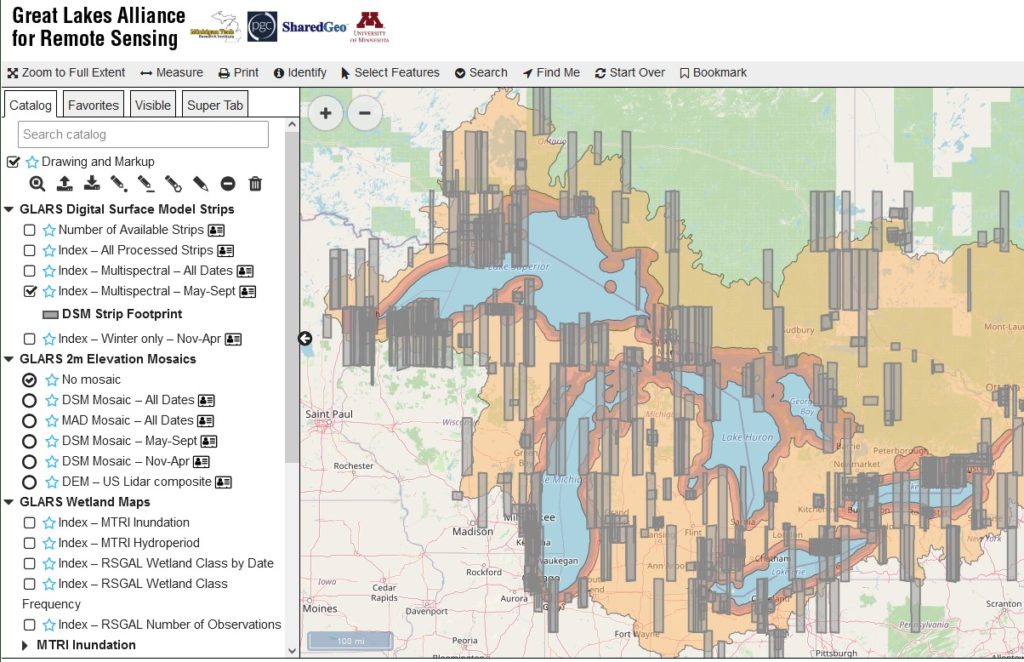
- When you have a data set you would like to download as in the example below for “MTRI Inundation,” click on the appropriate check mark box for an “Index” layer.
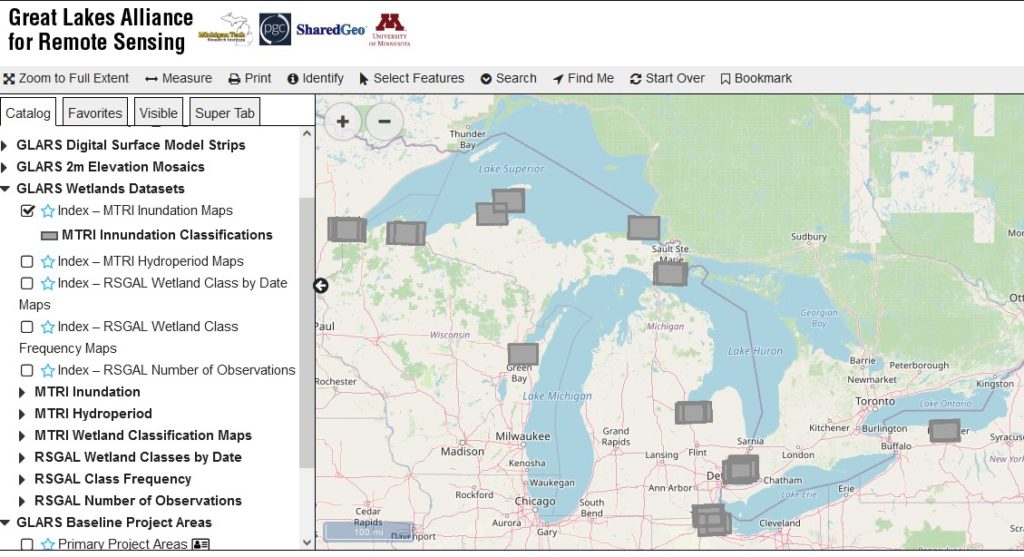
- Zoom in on an area of interest,
- Click “Identify” on the menu bar over the viewing window, then
- Click on a point, and
- Select “GO” in the side bar. This will give you a list of all the products available at that point, the location name, and date.
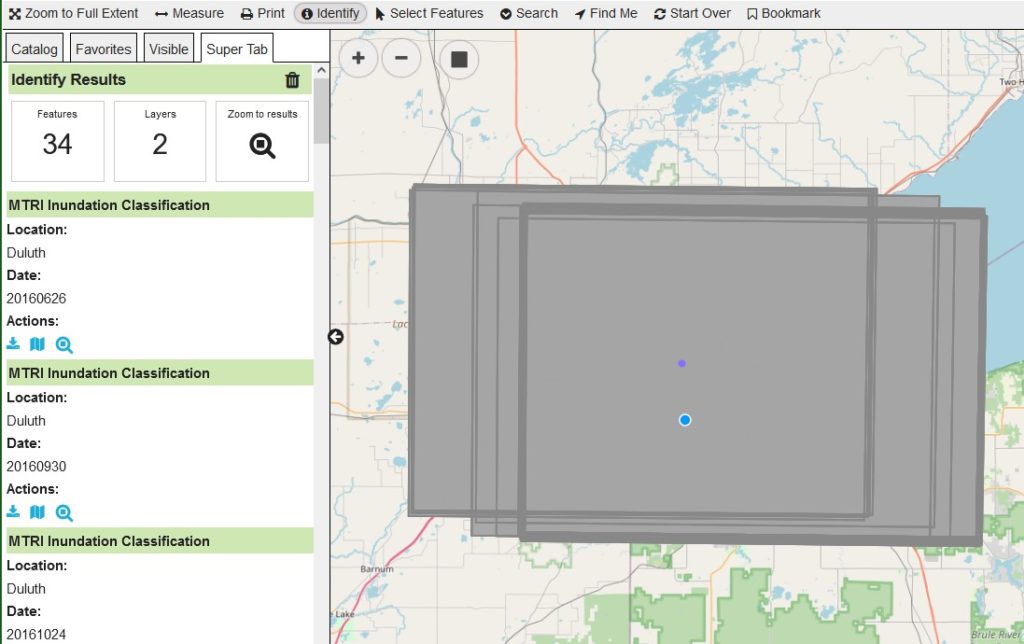
- You can use the tool bar icons to download that product, to show data on map, or zoom to extent.

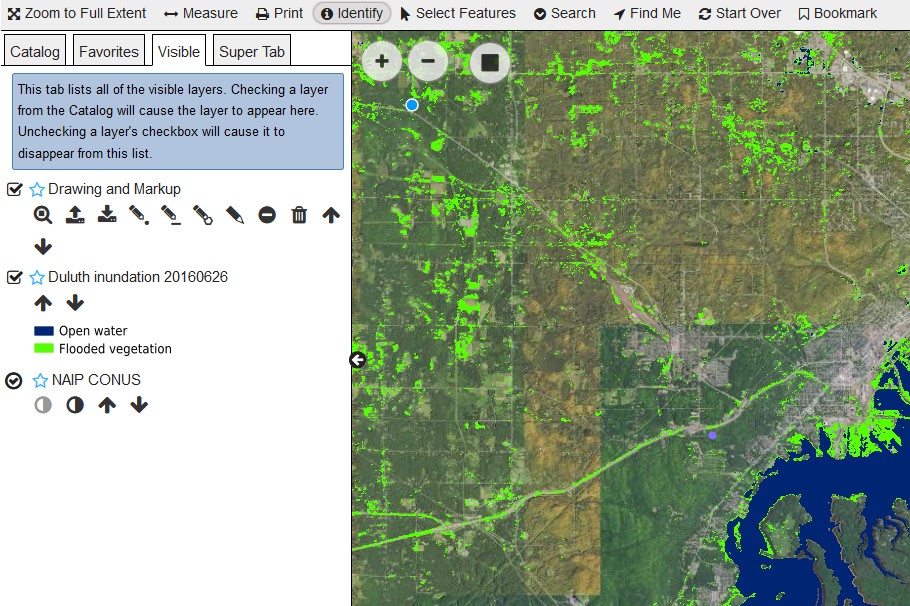
- “Show on Map” for one product would look like this:
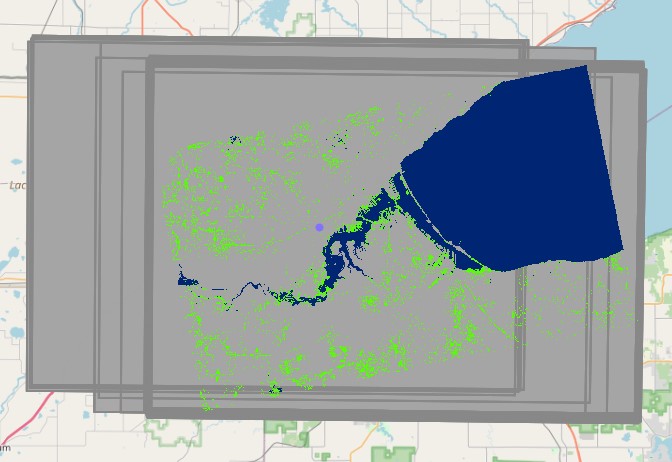
- Turn off the Index layer and you can see the Show on Map results directly on the basemap or aerial photo background.
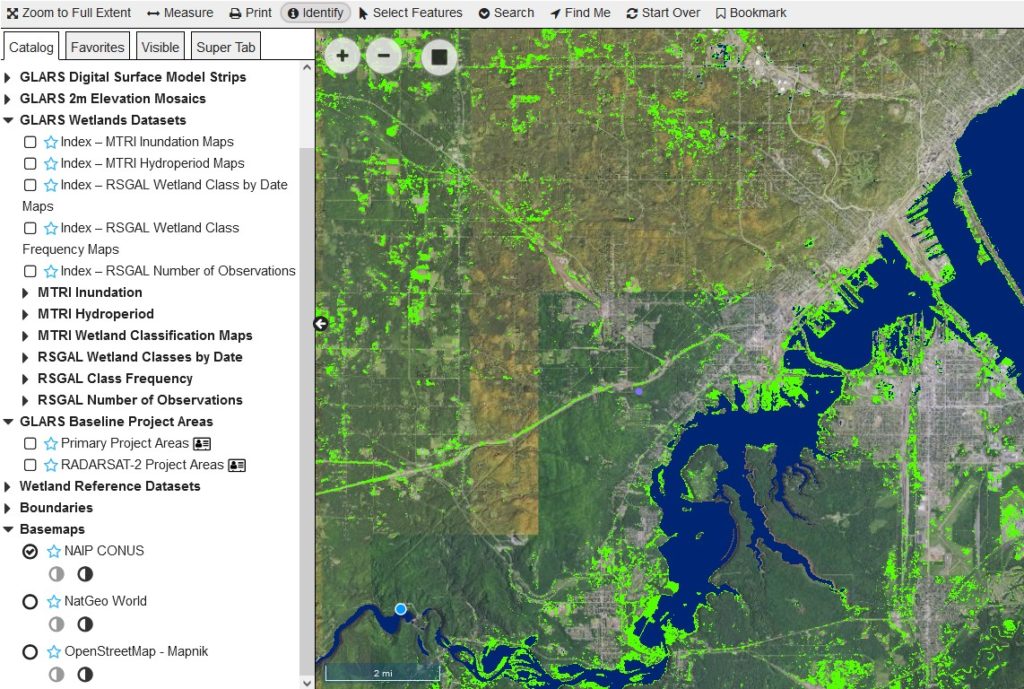
- To turn off the Show on Map results, go to the “Visible” tab and turn off that layer.
- To download a product, click on the respective download icon in the “Identify Results” side bar. This will create the download of the selected file to the location of your choosing.
Download Multiple Files
- An alternative way to select files for download is to use “Select Features” and draw a point or box (click, then drag) or polygon (repeated clicks to draw) for the area you wish to search, then hit GO.
- This gives you a table of results that you can sort.
- You can download the list of results itself as a CSV by using the black download icon in the upper left corner of the table. The downloaded list includes the path name to each file, and can be used with a batch script to download multiple files.
DSM Specific Instructions
Download of DSM products is mostly the same as other GLARS products. However, find below instructions specific to DSMs which show differences in view and delivery.
Download a Single DSM File
- Choose an Index file for the type of data you want to download (checkbox).
- Zoom in on area of interest, click “Identify” on the bar menu over the viewer, then click on a point, and hit “GO” in the sidebar. This gives you a list of all the products available at that point. For the Digital Surface Model Strips, the products have a Pairname and Date.

- Use the Download icon to get a list of the files that make up the DSM Strip product.

- The contents of the folder will look something like the below graphic (varies depending on size of the strips and date collected).

- The first part of the name is based on the stereo imagery pair used
- Some DSM Strips are very large and have been broken up into segments for easier download and management, the “seg1”, “seg2” etc. in the name represents the segment number
- The “2m” represents the resolution of the file
Download Multiple DSM Files
An alternative way to select files for download is to use “Select Features” from the menu bar, and draw a point or box (click, then drag) or polygon (click each node, then click on the first node to close), then hit “GO”.
This gives you a table of results that you can sort or filter by using the tools at the top of the list. You can sort the left-most column by whether there’s a downloadable file or not.

The strip changes color on the map when you scroll over it in the list.
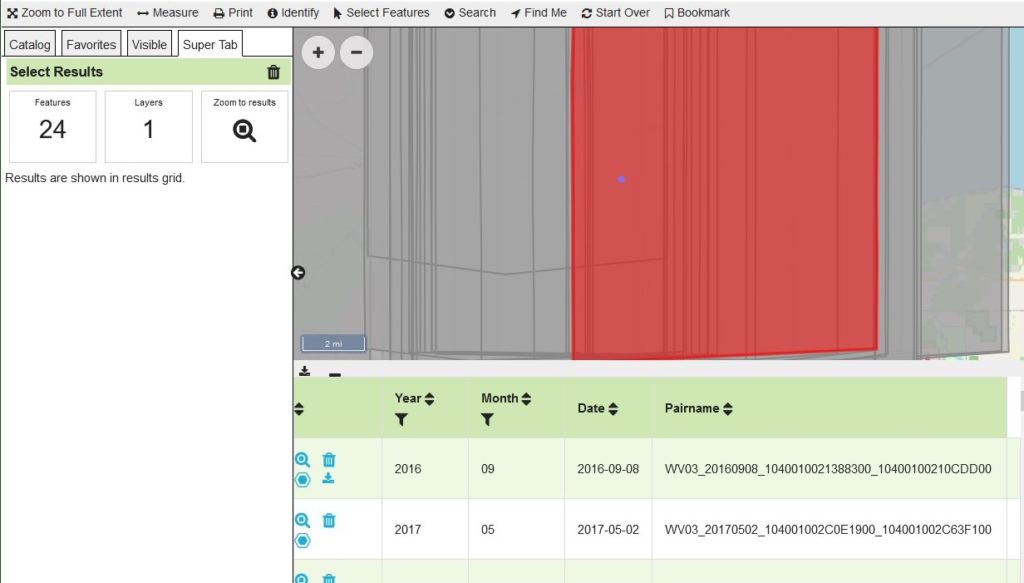
You can download the list of results itself as a CSV by using the black download icon in the upper left corner of the table. The downloaded list includes the path name to each file, and can be used with a batch script to download multiple files.
Go back to the map and hit the Super Tab – Select Results trashcan to clear the selection.
Other things to know:
- In Select, instead of drawing a polygon or point, you can do “Feature from: US Counties” or another Boundary Layer (must be turned on in Catalog before you do Select).
- To select the boundary, you have to click on the boundary line itself, not just within the boundary.
Download a DSM Mosaic File
- Choose a DSM or MAD Mosaic Layer in the Catalog, then choose “Select Features” from the menu bar above the viewing window.
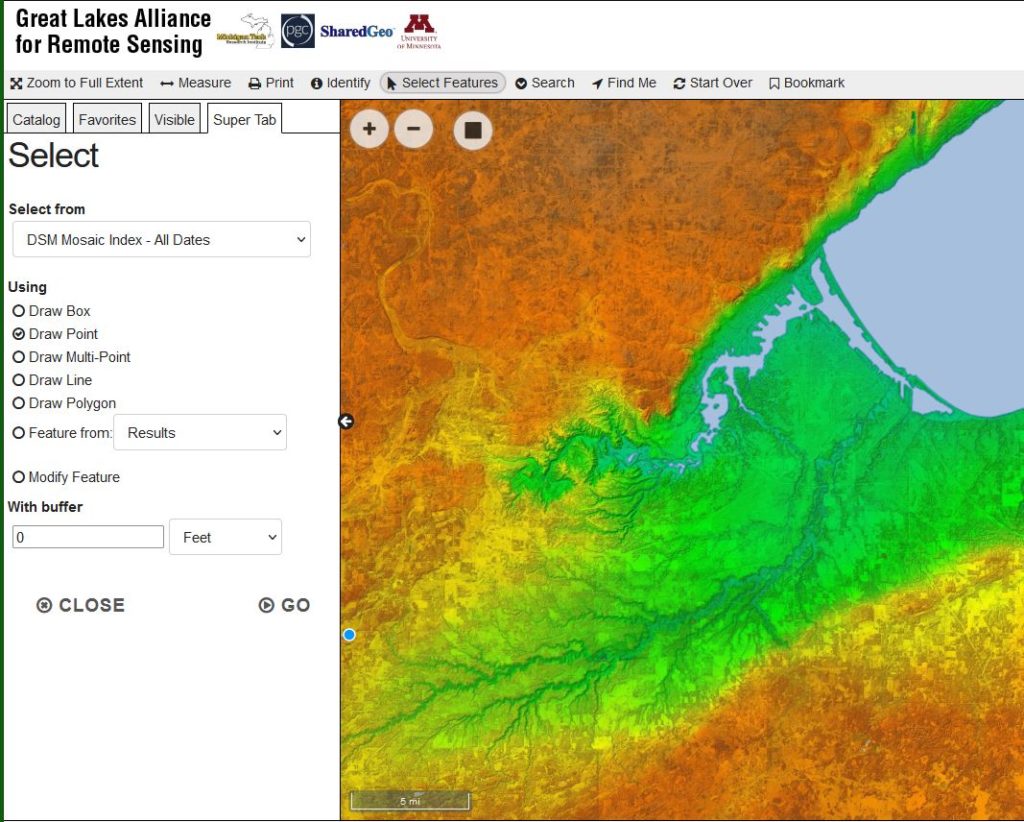
- Draw a point, or draw a box (click, then move), or draw a polygon (click, move and click again, repeated until clicking on starting point to close the polygon), then click “GO”
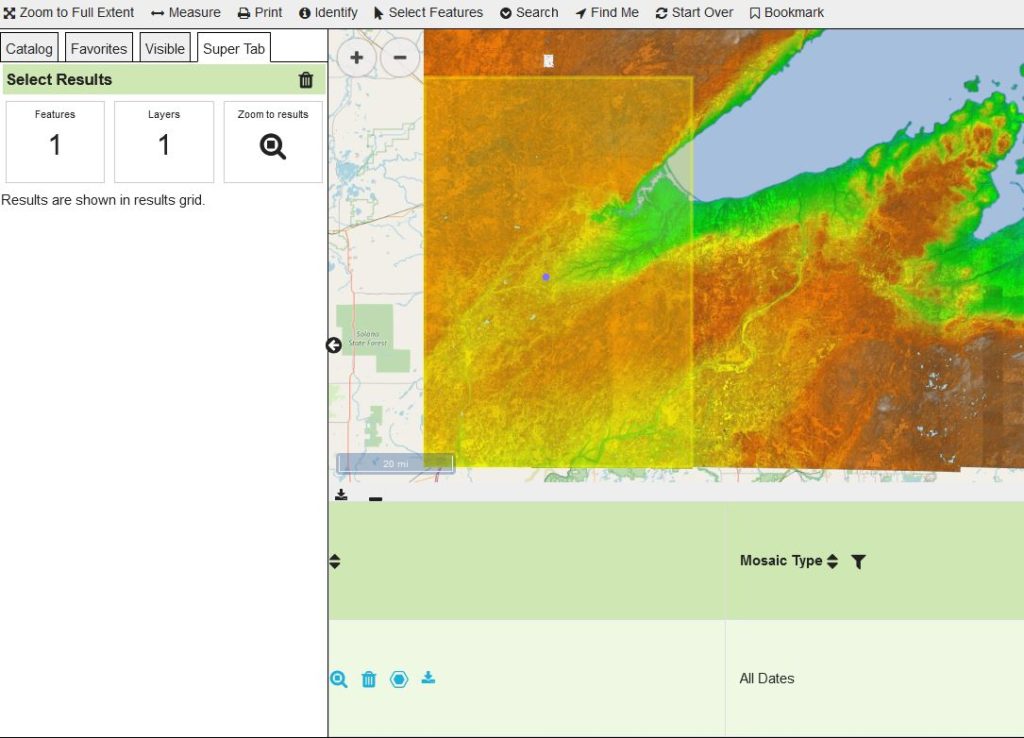
- Download the desired mosaic by clicking the appropriate download icon in the listing immediately below the viewing window.